
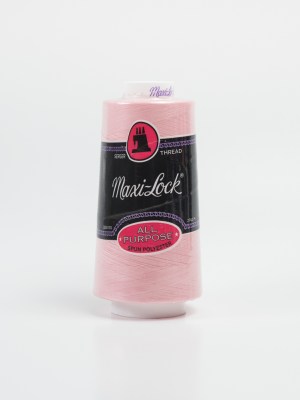
 Maxi-Lock Serger Thread 3000yds - Medium Pink
  Maxi-Lock Serger Thread 3000yds - Hacienda
  Maxi-Lock Stretch Serger Thread 2000yds - Lilac
  Maxi-Lock Stretch Serger Thread 2000yds - Purple
  Clover Pen Style Chaco Liner - Silver
 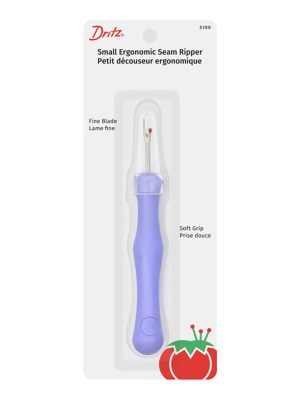 Dritz Small Ergonomic Seam Ripper - Purple
  Rit All-Purpose Box Fabric Dye - Cocoa Brown - 1 1/8oz
  Rit DyeMore Synthetic Fiber Dye - Sand Stone - 7oz Bottle
Fabric Basics & Precision Cutting
@Tilly and the Buttons
@SewWhatAlicia
@Seamwork
Step-by-Step Instructions:
Precision cutting is the absolute foundation of a successful sewing or quilting project. If your fabric is cut off-grain or your measurements are skewed, your seams will not match up, and your finished project may twist or warp.
Materials Needed:
- Fabric
- Self-healing cutting mat
- Clear acrylic ruler (with grid lines)
- Rotary cutter
- Iron and pressing mat
Tips for Success:
- Always iron your fabric first. You cannot get an accurate cut if your fabric has creases or wrinkles.
- Change your rotary blade frequently. A dull blade forces you to push too hard, which is dangerous and leads to jagged cuts.
1. Identify the Grain and Selvedge
- Look for the selvedge—the tightly woven, factory-finished edges of the fabric (often printed with text or color dots). The “straight grain” runs perfectly parallel to the selvedge. The “cross grain” runs perpendicular to it, from selvedge to selvedge.
2. Fold and Align
- Fold your fabric in half so the two selvedge edges meet exactly. Smooth the fabric flat. If the fabric has a diagonal wrinkle that won’t smooth out when the selvedges are together, the fabric is slightly off-grain and needs to be gently pulled on the bias to re-align the fibers.
3. Square Up the Raw Edge
- Before you cut pattern pieces or quilt strips, you must create a perfectly straight starting line. Place your folded fabric on the cutting mat. Lay your acrylic ruler across the fabric so that a horizontal line on the ruler aligns perfectly with the folded bottom edge of the fabric.
4. Proper Stance and Grip
- Stand up! You cannot apply proper downward pressure while sitting. Hold the rotary cutter in your dominant hand with your index finger resting on top of the blade guard for control. Spread your non-dominant hand firmly on the ruler to keep it from slipping.
5. Make the Cut
- Place the blade against the edge of the ruler. Apply firm, even, downward pressure and push the cutter away from your body in a smooth, continuous motion. Close the blade guard immediately after making your cut. You now have a perfectly squared edge!
6. Measure and Cut Pieces
- To cut your pieces (like a 2.5-inch strip), use the lines on your acrylic ruler. Align the 2.5-inch mark on your ruler perfectly with the clean edge you just cut. Keep the horizontal lines matched with the bottom fold. Cut smoothly away from yourself.
Top FAQs for Fabric Cutting:
What is the selvedge? +
The selvedge is the self-finished edge of the fabric produced by the manufacturer to stop it from unraveling on the bolt. It is densely woven and does not stretch, making it your primary reference point for finding the grainline.
What does “cut on the grain” mean? +
Cutting on the grain means aligning your pattern pieces parallel to the straight-grain threads (which run parallel to the selvedge). This is crucial because the straight grain has the least amount of stretch, ensuring your finished garment or quilt block hangs correctly and doesn’t warp.
What is the bias? +
The bias runs at a 45-degree angle to the straight grain. The fabric has the most stretch on the bias. While you generally avoid cutting quilt squares on the bias to prevent warping, you specifically cut strips on the bias when making binding for curved edges.
Can I use the lines on my cutting mat to measure? +
It is highly recommended to always use the lines on your acrylic ruler, not the mat. Mat lines can distort over time with heavy use and heat, and shifting your focus between the mat lines and the ruler edge often leads to crooked, inaccurate cuts.
Why isn’t my rotary cutter cutting all the way through the fabric? +
If you are leaving “skipped” threads behind, your blade is likely dull or has a nick in it and needs to be replaced. It can also happen if you are cutting while sitting down, which prevents you from applying enough even, downward pressure across the whole cut.
Should I pre-wash my fabric before cutting? +
For garment sewing, absolutely yes! You want the fabric to shrink before you cut it to size. For quilting, it is largely a matter of preference. Many quilters prefer not to pre-wash because unwashed fabric retains its factory stiffener (sizing), making it much crisper and easier to cut accurately.
